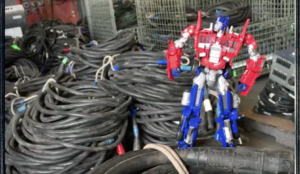
One more version to go before these are ready for full release…
The delays on this model were first caused by the sprue sizes. My printer increased the sprue size requirement from 1mm to 2mm.. Which took nearly a month for them to finally contact me about after two failed prints… Dang-it! Now that Combiner Wars is now launched I am able to see the difference of these hands which shows how terrible looking the CW hands are! I started these WAY before Combiner wars was a rumor so with that here is some final notes I have for final release..
1) Fingers had some slight issues with the joints. Need to shave off a corner so they can bend properly. **Fixed (I did this manually with an xacto knife..)
2) Palm needs a bit more room so the fingers can make a “fist” properly. **fixed, but may need to re-evaluate spacing..
3) Spruing needs to be re-evaluated. Cutting these out was a bit of a nightmare!
4) 5mm gun port needs to be spaced a bit more and port needs to be longer for larger weapons.
5) 5mm hand connector port needs to be shaped or slightly .1 mm larger to make a snug fit.
Once these are fixed and handled I think this should be ready for consumer use. These hands do require a good bit of work, but the results are extremely satisfying. This current version is one that I will still even use now for my CW Superion.
Things to keep in mind with 3D Print hands, and multi-part pieces.
1) You will have to cut them out with wire cutter’s or a sharp knife.
2) Sprued parts will need to be shaved down or sanded even if “Polished”
3) Parts will require a good soap bath / water bath to get the “dust” cleaned from it.
4) Even if you printed in the color desired you will still want to spray paint them with a nice paint. The joints will be much tighter and fit better together. I used Krylon White Glossy Primer and it helped a lot! You might even do a glossy or satin clear spray if you like the color printed in. This will at least give it a more finished look. Even still a spray paint will fill in any small holes.
5) Fingers because of the type of joints they are need an extra bit of tightening with either a clear nail polish or Pledge Floor Care (Also known as Future floor polish..) I did this with the ones seen and after 4 hours of drying they are near perfect!
6) Last you will need to glue the back of the hands to close the fingers into the palms. This step is one step I didn’t add in my first model and regret not doing it. This will prevent the fingers from falling out easily or at all.
Right now these are being priced at $15. My goal is to get them down below $10. (Shipping is about $4-$6. So hopefully $15 shipped…) This will make them extremely competitive with the PC-01 & PC-02 PerfectEffect add-ons.
Back Story on the Version 1…
You can ignore this next paragraph if you don’t care about the history of these hands…
The first set of hands I printed were exactly that… My first… Riddled with issues and lack of mobility. I do not even want to show them here, because when I got them I was so disappointed. Ball joint into the palms was not a two piece section to prevent them from popping out. Fingers were two parts and not three. Thumbs… Thumbs on one of them didn’t even stay in, and the second one stayed in but I had to use some special putty that only worked on one of them. And finally had to glue one of them on… The ONLY part that worked perfectly was the joints in the fingers which was a double ball joint that allows a good bit of mobility. Anyways I have retired this model entirely and moved on to making a whole new set. (Moving one with my lessons learned…)


