Combiner Wars Transformers Tv Advertisement

Transformers Hong Kong posted this morning a Combiner Wars Promotional Video. This video only shows Superion and Menasor. However it has some really nice effects.


變形金剛 合體金剛大戰 【變形金剛 合體金剛大戰模型】現已有售!合體後會得到更多、更大的勇氣!立即製造你的終極合體金剛!

Posted by Transformers Hong Kong on Thursday, June 4, 2015

Share it:

Superion and Menasor Art

So these awesome posters have been showing up all over the net. Felt like they were worthy of posting. Menasor and Superion being Hasbro’s most recent Wave 1 and Wave 2 Transformer line releases. Enjoy!

Share it:

Combiner Wars Superion hand mod

For those who don’t want to spend the extra buck on buying new hands for Superion or even Menasor… Here is a great mod by RK Designs Studio

Basically he cuts the “fat” off the hands and splices the fingers so they can all bend without being hindered by each part. See the pictures mirrored below.


A cheap wat to get your Combiner Wars Generations gestalt bots to have articulated fingers…

Posted by RK Designs Studio on Tuesday, April 7, 2015

Share it:

HTS Wave 2 finally arrived! Menasor & Superion Complete!

Finally after about a month of waiting I have received one of my last shipments for a while… Completing Wave 1 & Wave 2. (Still considering Armada Megatron… I am also considering buying two more Powerglides, to do something similar as my Menasor below.) Gikpa Facebook page along with a few others have come up with an impressive Ultimate Prime mode with using three of him.

Below I have Menasor in a bit of a “fan mode” with the hips which makes him WAY taller and he does not fit in my bookshelves in my office. As you will see he even makes Superion “look up…”

Share it:

3D Printed Hands (V2)

One more version to go before these are ready for full release…

The delays on this model were first caused by the sprue sizes. My printer increased the sprue size requirement from 1mm to 2mm.. Which took nearly a month for them to finally contact me about after two failed prints… Dang-it! Now that Combiner Wars is now launched I am able to see the difference of these hands which shows how terrible looking the CW hands are! I started these WAY before Combiner wars was a rumor so with that here is some final notes I have for final release..

1) Fingers had some slight issues with the joints. Need to shave off a corner so they can bend properly. **Fixed (I did this manually with an xacto knife..)

2) Palm needs a bit more room so the fingers can make a “fist” properly. **fixed, but may need to re-evaluate spacing..

3) Spruing needs to be re-evaluated. Cutting these out was a bit of a nightmare!

4) 5mm gun port needs to be spaced a bit more and port needs to be longer for larger weapons.

5) 5mm hand connector port needs to be shaped or slightly .1 mm larger to make a snug fit.

Once these are fixed and handled I think this should be ready for consumer use. These hands do require a good bit of work, but the results are extremely satisfying. This current version is one that I will still even use now for my CW Superion.

Things to keep in mind with 3D Print hands, and multi-part pieces.

1) You will have to cut them out with wire cutter’s or a sharp knife.

2) Sprued parts will need to be shaved down or sanded even if “Polished”

3) Parts will require a good soap bath / water bath to get the “dust” cleaned from it.

4) Even if you printed in the color desired you will still want to spray paint them with a nice paint. The joints will  be much tighter and fit better together. I used Krylon White Glossy Primer and it helped a lot! You might even do a glossy or satin clear spray if you like the color printed in. This will at least give it a more finished look. Even still a spray paint will fill in any small holes.

5) Fingers because of the type of joints they are need an extra bit of tightening with either a clear nail polish or Pledge Floor Care (Also known as Future floor polish..) I did this with the ones seen and after 4 hours of drying they are near perfect!

6) Last you will need to glue the back of the hands to close the fingers into the palms. This step is one step I didn’t add in my first model and regret not doing it. This will prevent the fingers from falling out easily or at all.

Right now these are being priced at $15. My goal is to get them down below $10. (Shipping is about $4-$6. So hopefully $15 shipped…) This will make them extremely competitive with the PC-01 & PC-02 PerfectEffect add-ons.


Back Story on the Version 1…

You can ignore this next paragraph if you don’t care about the history of these hands…

The first set of hands I printed were exactly that… My first… Riddled with issues and lack of mobility. I do not even want to show them here, because when I got them I was so disappointed. Ball joint into the palms was not a two piece section to prevent them from popping out. Fingers were two parts and not three. Thumbs… Thumbs on one of them didn’t even stay in, and the second one stayed in but I had to use some special putty that only worked on one of them. And finally had to glue one of them on… The ONLY part that worked perfectly was the joints in the fingers which was a double ball joint that allows a good bit of mobility. Anyways I have retired this model entirely and moved on to making a whole new set. (Moving one with my lessons learned…)

Tags:
Share it:

Combiner Wars Chest Pieces

A common thing at the moment is to merge different limbs in different manners including adding different parts to Optimus Prime’s chest (Ultra Prime), Superion, and Menasor. So to show how people are doing this and what they look like. Sources listed below.

Seibertron Member: Cobotron (Powerglide chest)

Seibertron Member: jaws (4 Skydives for all Superion’s limbs, G1 turned around limbs.)

Seibertron Member: albnok (Ultra Prime, legs turned around and chest reverted.)

Seibertron Member: Arctorro (Superion with Thundercracker chest **not stable)

Seibertron Member: william-james88 (Superion/Menasor with Black Jack chest)

Gikpa Facebok Page (Menasor using three black jacks for shoulders, and chest.)

(If your pictures are in here and you are not credited let us know we will make sure to source you!)

Images have been mirrored for archiving.

Share it:

Combiner Wars Superion

I finally have Superion together all but the final (technically two more pieces… Alpha Bravo though is nice!) At first I have to say I was pretty stand off on this figure, but after getting him in hand and looking at each of the figures that make him. Talking about memories from the 80’s and 90’s! WOW! I really can’t wait for the next several waves of Transformers to come out as they all are really pretty awesome!

He stands right around 11 (inches) and if you extend his bottom two legs he can stand 14 (inches) tall.  All the deluxe figures either “fold” or collapse their legs into itself. You can leave this extended out to maximize his height. (Making him a little more proportioned…)

You can see him extended as tall as you can make him next to ROTF Bruticus (Crossfire add-on) and ROTF Superion (FansProject add-on.) Extended he dwarfs them a good bit… Which is pretty funny!

Only two con’s…

1) His feet are WAY to small… They hide behind the bottom parts of the deluxe figures and they really have very little possibility. (Working on a kit bash for this!)

2) Some of the deluxe figures just after taking them out of the packaging felt already “lose.” Their Arms and legs should be a bit tighter than this and it worries me that over time they will only get even more lose.

Anyways ill let him speak for himself. I did not take individual shots, as there are so many out there. I might take more pictures in the future but for now here is Superion.


Share it:

Cybertronian Metal Diorama – Part I

So diorama’s are showing up all over the net. Lots of people recreating the “Ark.” Which is cool, however I have no intentions of creating the G1 variation of colors, but rather something a bit more realistic. Which brings me to.. What you will need…

1) Aluminum Foil (I picked up the biggest sheet I could find.)

2) Foam / Foam core & cardboard. (Try to make sure the foam is smooth on one side. Otherwise any indentions will lead to the foil showing imperfections or different textures.) You might be able to use some other materials, and even just Foam Board. I used this method as I had it in my garage.

3) Elmers glue (Other glues work but be careful you don’t melt the foam!)

4) Xacto Knife or a sharp blade.

5) Sharpie

6) Measuring Ruler, or something straight (ruler is nice as you can measure your shapes!)

You will need to decide a few things.

– Do you want your diorama to be shiny or more flat. Aluminum foil has two sides that can give two distinct looks. I did both, and the results were really interesting. I used the shiny one for my floor and the other two as the flatter color.

– Type of glue. I used Elmers glue, but there are other glues that will work probably better. Stronger bonds, and even hold better such as a contact cement. Just make sure it doesn’t melt your foam when gluing! Its also important to make sure you get a nice even amount of glue otherwise the foil may bubble.

On to the steps!

1) Glue your cardboard and foam together (Optional) if you need extra support. Elmers glue does a REALLY good job, between cardboard an foam.

2) Let this dry for 15-20 minutes (doesn’t take long…) let it sit longer if you really want a good bond.

3) Zig zag and cross zig zag the foam with a nice covering of glue. (Other glues you can brush on which is nice because you can get a nice covering with no missing areas.) Elmer glue you can add a little bit of water to it but have to wait longer for it to dry. And this sometimes weakens it.

4) Pick which side of aluminum foil you are going with. Make sure you pull long enough sheet to wrap the edges.

5) Start form one corner to the next and gently press and smooth out the bubbles. (Don’t use anything sharp!)

IMG_6481

6) Lines… This part feel free to be artistic. Make horizontal, vertical, and angle lines. Connecting irregular shapes… Remember in the Transformers universe everything technically transforms which may be irregular or connect in seemingly random methods. Try and make it is irregular as possible. I did use somewhat of a “guide” to get an idea of what to do artistically. You can even add circles, triangles, and other various shapes using coasters or maybe a coke can for larger circles.

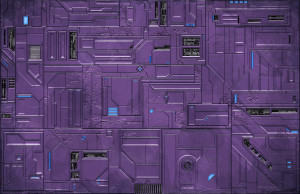
IMG_6480

nemesis1

Source: tformers.com (Mandingo Rex)

Finally –

Tape the edges (extra down on the back or glue.) I am going to use foil tape on the top and bottom to make sure it doesn’t rip there also. If you glued it really good it shouldn’t happen, but can still “smudge or bend…”

I would suggest if this is fitting within your display case that you cut the foam to size before starting. This will save you from having to cut the aluminum and resizing the whole thing down to fit later.

Part II of this tutorial will include painting and adding additional details. I need to do some testing before I start on this part as I am not sure how certain paints will work with the aluminum just yet. Part II is now complete click the link to see the results. I have more plans to do different variations in the near future.

Total project here for this was about 2 hours to complete. Which is A LOT less time than having to do some serious painting and such.

Material costs: (About) $25.

– Foam $1.50 – $5 a piece (Foam board is the least here…)
– Glue $2.00 – $5.00 (Depending on the type of glue you use…)
– Aluminum Foil $5.00 (Might be able to get this on sale. This also varies depending on the size.)
– Sharpie $1.50 or more for a pack.

Tags:
Share it: