***UPDATE December 28th 2014~!
I now have this sword for sale on Sculpteo. If you would like to purchase one please go to my Sculpteo store.
Price starting at $14.39 Sword of Triex (Now has a officialish name!)
—
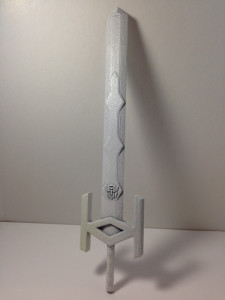
After having the Razor Sword printed I thought to myself, “I need to go bigger.” And well I did! At just over 18CM I give you… My next print… I have yet to name it, but right now referring it to Superion’s Sword / Sword of Iacon.
I was not able to print this with Shapeways as they have a 10CM rule about printing any sort of weapons. Instead I went with with Sculpteo. The material I chose to print in was Alumide Material. (Aluminum dust added to plastic…) Shapeways also has a similar material…
The sword is rather strong, and I am assuming would be similar strength in the regular white plastic strong (if not stronger.)
Anyways less talking more pictures!
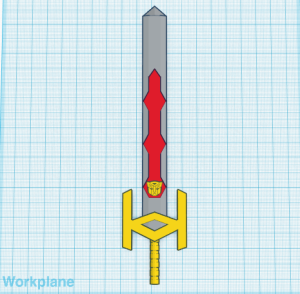

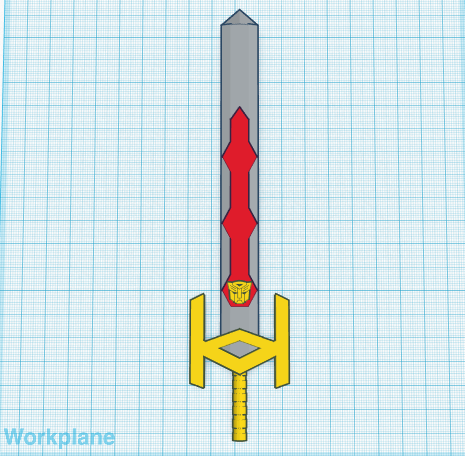
I started off using Tinkercad.com to build the 3D model.
The model was printed with Sculpteo in Alumide material. I picked this material specifically as a test to see how strong/weak and what the material was like with qualities/strengths/weaknesses.
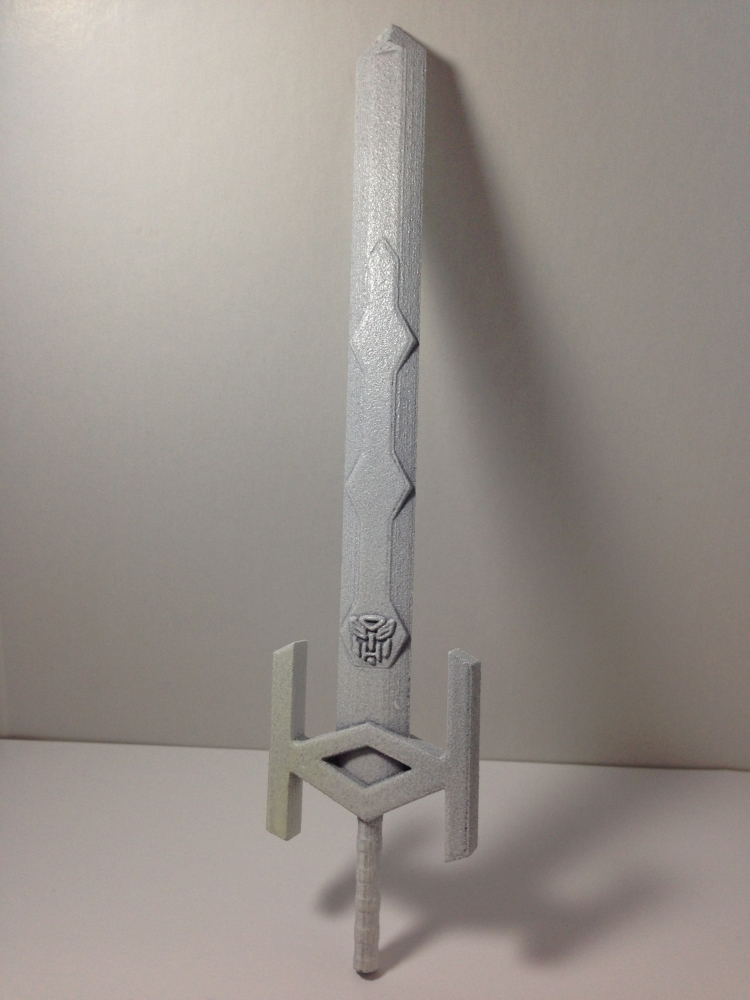
Receiving the model it came in somewhat grainy straight lines. (I figured this would come this way.) You can see in one of the first pictures above. The printed results I was pretty happy with, even with the Autobot emblem was slightly smudged on one side. This might have been from the way it was printed and clearly the size of the spacing in the emblem. Either way one side came out pretty clear (I might try to use some black acrylic accents on the emblem to make it stand out a bit more.)
To fill in some of the grainy lines I used a primer spray paint. (The second picture above is after the first coat.) After 2-3 coats it started to fill in and give it a much more smooth finish. Some of the swords edges also required some sanding due to this material being more on the grainy / rugged side.
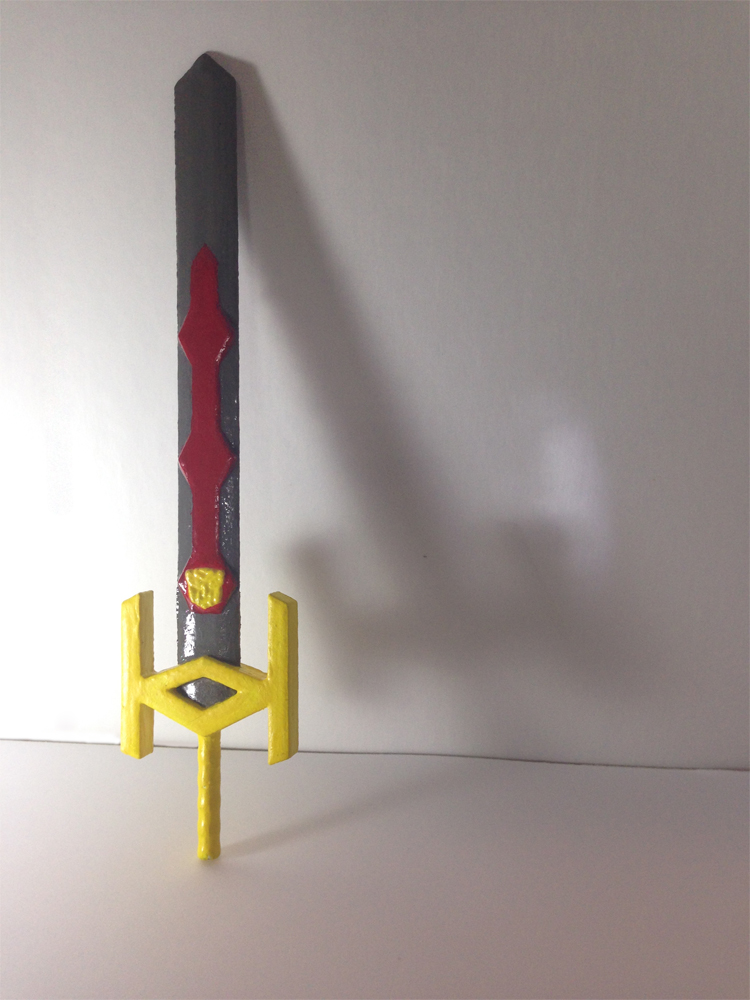
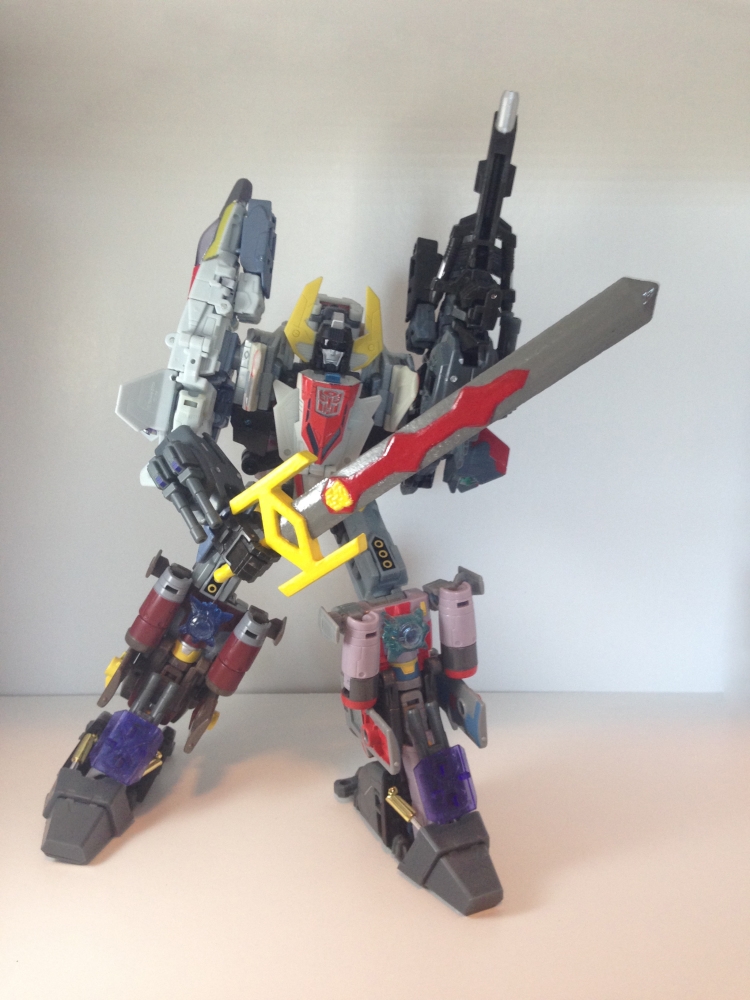
Painting it with a acrylic paint gave it a flat matte look with no shine. I did about another 2-3 coats especially on the yellow handle as I accidentally painted into yellow areas with the gray. (The gray tends to be VERY dark and thick!) I used some very small brush tips to refine the edges and give a very clear crisp lines.
After finishing painting I used a clear finish matte sealer. Which I did several coats of (which gave it a bit of the shine seen in the final pictures.) This dried very quickly and gave it a bit more strength.
To REALLY give it a final shine on the blade I used Pledge FloorCare multi-surface. This dries clear and gives it a little more protection.
—
Final notes going forward I am going to make all my pegs for hands to hold a blade slightly smaller than the 5mm. The problem is most items after painting, sealing, and so forth… Causes it to “scrape.” After reading some on the net this is also explained and they suggest going as much as .25 mm shy of the 5mm. To as little as .10 of the 5mm.
Finally when painting I highly suggest you understand the paint. The yellow I choose was SO thin when it went on that any mistakes I made with the darker colors (the gray) made me have to do SEVERAL layers of yellow to cover it up. When I did the red I learned this so I simply covered the whole blade in gray then came back with the red. (This gave it a bit darker red which fits nicely with Superion’s red!)
Products Used:

 DecoArt DASK264 Americana Primary Sample Pack

 SC Johnson Pledge Floor Care Multi-Surface Finish 27 OZ